Ever make corn tortillas from scratch? Me neither.
It's not that I didn't try, it's that I apparently had no idea what I was doing. Oh, I followed directions, it was the lack of a "tortilla press" and cooking it properly that I seemed to have gone afoul.
Oh well. I was going to tell you about making your own, authentic tortillas and say how easy it was, but, well, that ain't gonna happen tonight. Woof.
Ok, so what can I tell you that's useful? Oh, here's a grilling tidbit you may not know about. Saw it in this month's Esquire magazine. It's an easy, non-intrusive way to tell if the steak you're grilling this summer is rare, medium rare, medium or medium well.
Here's what you do: Take your right hand and make an "OK" sign with your index finger pressed lightly onto your thumb. Now, with your left index finger, press the muscle under your right thumb. That's what a rare steak feels like.
Side note – Never, ever, ever cut into the meat to see if it's done or press down on it to see what color the juices are. Because once the juices are out, you can't put them back in.
Ok, so you've got rare. You can tell medium rare by pressing your middle finger to your thumb. Medium is your ring finger to your thumb. And medium well is your pinky ring to your thumb. What's well done feel like? The bottom of your shoe.
So try that this weekend when your cooking out. Or show it off to your brother-in-law and just play cool like you've know that trick for years. And try not to smile
Now, if you'll excuse me, I've got a kitchen to clean up.
Wednesday, May 21, 2008
Monday, May 19, 2008
Memphis - Day Three, Leaving Lucille
Day three here in Memphis and as you watch the waterfront, you can see everyone has one thing on their mind. Pack up. Pick up. Get gone.
The hope of many teams after the competition is to get in line to leave as soon as possible and, with any luck, get out of the gates around noon. That's the hope. The reality is they won't get out of the gates until much, much later.
Probably the most interesting place to be during the mass of action is beside one of the huge trash dumpsters. People throwing out anything and everything that won't fit of the drive home. Some flooring here. Some siding there. I actually saw a slightly used Weber grill abandoned by the dumpster (my curiosity still wishes I'd gone and checked it out).
And as the afternoon wears on, this barbeque carnival, complete with booths, entertainment and people from every walk of life is now giving way back to its former self as a beautiful waterfront. The only thing that remain are some faint smells of smoked hickory lingering in the air. And that abandoned Weber grill sitting beside the dumpster.
But what a time it was.
To take a look at the full list of winners from this year's championship, click here:
http://www.myfoxmemphis.com/myfox/pages/Home/Detail?contentId=6566764&version=2&locale=EN-US&layoutCode=TSTY&pageId=1.1.1
Again, a great time. A time of a lifetime to be exact, and one I hope to experience again next year.
Saturday, May 17, 2008
Memphis - Day Two, Here Come the Judges
I can now never eat ribs in a restaurant again, they won't be anywhere close to the ribs we had today. Tender. Succulent. Moist. Smokey. Flavorful. Just how you imagine ribs could be. There's no way, I've officially been spoiled. Again, thanks to our friends on the Cincinnati "Hog Heaven" team, you guys are the best. And I encourage you to grab some Bubba Brothers barbeque sauce as well (available locally or online at bubbabros.com)
As the day wore on, we got to see the Hog Heaven team prep their rib entries (note : a little spray of Pam sprayed on the meat makes it shimmer and adds tons of style points). They chose the very best of several slabs of ribs and then decided on the slab they'd use for "blind judging". Then it was off for the "victory walk" where Dwight and Bubba walked the rib and sauce samples to the blind judging area.
Then we waited. And waited to see if the judges returned to our booth to let us know if Hog Heaven as in the finals .
And they did, but not our team, the team next to us. A group named "Here For The Beer" out of Little Rock. All of them white color professionals by day, barbeque (and beer) fanatics by night. Being in the finals meant an automatic placing of first, second or third and some well-deserved honors (Pat, congrats again on your team's big win).
Now, when it comes to World Championship Barbeque, when you're notified you're in the finals it means one thing: prep the area for the judges. Clean, pick up and make sure your area looks the very best it can be. Act like a four-star general is coming to sample your entrée. And everyone, including fellow competitors, pitched in to help make sure Here For the Beer's booth and presentation was the best it could be. A truly cool sight indeed.
The judging itself took about 15 minutes and started with a judges tour of the facilities, the techniques and woods the team used, an explanation of the prep work, and finally, a sit-down tasting of ribs by all three judges. During that time no one else but the presenters from Here for the Beer or the judges spoke a word, turning our section of the midway from a carnival feel to more of the final hole at St. Andrews.
After the judging, it was back to sampling other's rib entries, talking amongst competitors and planning for tomorrow: tear down and travel.
Which is what we'll be doing tomorrow. But tonight, we're gonna check out Beale Street. Really check it out. And who knows? Maybe run into some of our new friends from Here For the Beer and maybe buy them a round. Maybe.
Friday, May 16, 2008
Memphis - Day One
First thing off the bat, lemme just say how impressed I am with Memphis. Really. I had some assumptions about the home of Elvis driving down here and let me just say how the city has exceeded them mightily. This is a city trying very hard to be its best, a cross of Charlotte, North Carolina and New Orleans. And that, friends, isn't bad at all.
So what was Day One like? Hundreds of competitors from across the nation and some, around the world. I got to meet Britain's newest Barbeque Champ, Dylan Rogers and got to speak to him for few moments (congratulations again, Dylan, I'm sure it's well deserved). Saw literally over 100 competitors' booths, some two and three stories high, theme decorated and hard core dedicated. And saw people prepping their meat in everything from a second-hand Weber cooker to a $100K smoker.
I even got to take in a free judging seminar and here are the keys they told us:
1. Cook it low and slow. Rule #1. 225° on the heat for 4-6 hours.
2. Smoke the meat for two hours max. After that you're not doing the meat any good. The pores seal shut and you can dry the meat out.
3. No lighter fluid ever. If a judge tastes lighter fluid, there's no way you'll score well.
4. Charcoal is king. And champs know where to get specialized charcoal with hardwoods injected into them.
5. Indirect heat is a must. Hardwoods for flavor. Charcoal to keep the heat going.
6. The best meat generally comes from meat specialists, but if you know what you're looking for, Costco and Sam's club has good meat. If...you know what you're looking for.
7. Make sure the meat is done. Honestly. They said they run into more entries than you can imagine where the meat isn't even done. Smoke it for two hours max, slow cook it for 4-6 more. That's a good general rule of thumb for making some excellent barbecue whether it's for the world championship or trying to one-up your brother in law at home
Now, as far as ribs go, they told us the meat should pull off the bone, but not come completely off. That's a sign it's been overcooked. When looking at meat, they look at it across the whole slab (generally, the "Ten Ribs") looking for consistency in color, texture, that no bones are poking out (the side is ok...the ends, that's a "no, no") and when they pull up the slab, that the slab stays together. Tricky, huh? Tender, but not too tender. Done, but not too done.
They also look for the telltale smoke ring, that pink ring that proves it's been well smoked and it worthy of consideration to be "World Championship Caliber". They also talked about the point system (if you score lower than a 9, you'd better go back to the drawing board), cuts of meat, different classes, different sauces and how anyone, with some time and some expert instruction, can become a qualified barbeque judge worthy of determining the "World's Best".
But...they did warn. Once you know what real barbeque tastes like, chances are the corner barbeque joint just won't cut it anymore. Hey, I'm just warning you ahead of time.
Hello to all my new friends from Kansas City, Minnesota, Memphis and of course, Texas. Ya'll at Cowboy's (check out cowboysbbq.com) make a killer ribless barbecue sandwich. Hats off to you all in Fort Worth.
Tomorrow, it's an early wake up call. Will be helping out the Cincy team prep for ribs competition. And the work starts at 4:30 am – sharp! Be a short night on Beale Street tonight, kids.
Thursday, May 15, 2008
Memphis in the Meantime
Well, I'm here in Memphis for the World Championship Bar-B-Q Festival. I was asked to come by some of my Cincinnati friends (Hi, Joanne...wish you were here) who actually won the competition a few years ago. They heard I was a barbeque fan, had this food blog and told me I needed to come down and experience a real competition first hand.
So, eight hours, three states, five rain storms and a near collision with a Roadway 18-wheeler later, I'm here and have already seen the tents lined up on the riverbank. This...is going to be cool.
The plan for tomorrow is to find our group ("Hog Heaven"), check in with them, hang out, help out and learn. I'm sure along the way, I'll make some new friends, pick up some new cooking tips to share with you all and, hopefully, add some new readers who can teach us all how to do it up "proper".
I'll be blogging (ok, I plan to blog) every day to let you know how things are going, share some stories and pass along any tips and tricks (maybe a secret or two?) I discover along to you. So fire up the grill, break out the hardwood and check in with me over the next few days.
'Cause we're gonna make some "real" barbeque, kids. And do it up proper.
Sunday, April 13, 2008
Ukelalies and Banjos
A good friend of mine is a Pit Boss at City Barbeque and offered me a smoked bone-in ham last week (it's great having friends). So today being a cold, rainy day here in Cincinnati, I decided to make a "Sweet and Salty Ham and Pineapple" pizza.
Now, sometimes you'll see it called "Hawaiian Pizza" but, truth be known, since Hawaii is the largest consumer of Spam in the US (true), I don't think this was the "official" Hawaiian pizza. Let's just call it a "Brian Hawaiian Pizza" and get on to making some tasty eats, shall we?
So we've got our smoked country ham, or feel free to use cubed ham, sliced ham, prosciutto or whatever you like. Heck, throw in a little bacon if you want. There's so much right with bacon, you can never go wrong. Quote me on that.
For the pineapple portion of our program, I went ahead and bought a whole, fresh pineapple. Sure, I could have used some canned pineapple or "pre-cut", but part of cooking is working outside your boundaries, expanding the experience a little. A fresh pineapple is easy to cut and prep, so why not try it one time? But if you're in a rush, canned is fine (but only "fine", because "fresh" is so much finer).
Salty country smoked ham. Succulent fresh-cut pineapple. Now, it's at this point that you can add some "signatures" to your pizza.
1. Crust. Home-made, pre-made it's up to you. My friend Scott is owner of The Works Pizza in Loveland where they make some of the finest brick oven pizzas around. Give me one of his crusts and his brick oven and I'll be in heaven. But since my kitchen is more of a kitchette (or "kitchenito"), we'll just go with a off the shelf crust and use our humble gas oven.
2. Cheese. Ah, now here's where you can really add your own touch. I went with a mix of Monterey Jack and Mozzarella Blue Cheese, but feel free to experiment and add your own blend of cheeses. Just remember, "What would compliment the saltiness of the ham and sweetness of the pineapple"? We're after flavors and textures that can mingle together with the ham and pineapple, not fight for supremacy on the palette.
3. Tomato Sauce. Again, home-made is better, but it's a Sunday afternoon, so I went with a pre-made of oven-roasted tomatoes and basil – something not too heavy, just adds a nice addition to that flavor train we're creating.
Ham. Pineapple. Crust. Sauce. Cheeses. Got all that, now it's on to the prep. At this point, it'd be really easy to put the fresh cut pineapple and the ham on the sauced crust, top with cheese and throw that bad boy into the oven, and that's ok. However, you're not getting the most out of your main ingredients.
I strongly suggest you throw the pineapple chucks (or if you're like me, diced bits) into a hot pan and let it sear a bit. You're not trying to cook the pineapple, just warm it up and coax out the natural sweetness more than it is in its raw state. After a minute or two of searing, you'll find your pineapple is candy-sweet. And that kids, is a great compliment to our smoked salty country ham.
After you've seared the pineapple, put it aside in a dish and sear the ham in the same pan. Again, this helps release the true flavor of the ham, tenderizes it and brings out all its down home juicy goodness. In all, an extra five minutes of prep which makes a huge difference in the final product.
I will tell you it's at this point I placed the pineapple and ham on my sauced crust topped with my selected array of cheeses and baked it while singing an honorary chorus of "Tiny Bubbles" to the ghost of Don Ho.
And it was a good pizza, but not great. Here's why: We had salty and sweet (in fact searing the pineapple probably doubled its sweetness and while searing tempered the ham's saltiness by half) and the chesses where a nice addition but didn't add a ton of flavor.
But don't despair. I just made a whole new pizza. Oh, yes kids. Uncle Brian doesn't get this close to pizza perfection just to settle for what could have been. No no. That's when I hit the spice rack to find some simple fixes to really jack up the flavor. And the second time around was much, much better. Maybe even "signature".
With the pineapple, I tossed in a little cinnamon and just a pinch of ginger. And, to the ham, I threw in some basil, garlic powder, a little oregano and some lemon pepper along with cayenne pepper.
With the cheese, I put a thin layer down before putting on the pineapple and ham. And then alternated the layers (cheese/ham and pineapple mix...cheese/ham and pineapple mix...final layer of cheese). Because cheese is the glue and if you intertwine the cheese with the toppings, you won't get that layered, "cheese slider" thing going on. Omit that whole roof sliding off a house effect. Unless you dig that sort of thing.
And the second time around, it was much, much better.
Can this recipe be improved? Sure. I'd suggest sprinkling in some almonds or pine nuts for a complimentary texture to the ham. Or get a little crazy and put in some kiwi with the pineapple. Heck, add in some peppers to the party and some nicely chopped onion to open up the flavor matrix. It's your call.
And that's what makes cooking so great. If you're in a rush, "prep to oven" can be as little as five minutes. Or you can take some more time to make something truly special for your friends and family. Something sweet, salty and sassy.
In short, a perfect way to weather a dreary, cold Sunday.
Tuesday, April 1, 2008
The Skinny on Brisket Fat
When I started this blog, I made sure to mention whenever I made a mistake, I'd admit it. And although I didn't technically commit a culinary blunder, I did something making the brisket I shouldn't have.
Uh oh, that's not good.
Don't worry, it's nothing to call the CDC about. It's simply when you buy a brisket, make sure you trim some of the fat off. In the brisket cooking entry I said to put the brisket "fat side up", but I didn't tell you to trim some of that fat off.
Sorry about that.
So how much of the fat should you trim off? Well, that's up to you. You can leave all of it, it will just more time to cook it and make it harder for the rub to creep in. But before you go all Freddy Krueger on it, remember you'll want to leave at least a thin layer. Because the fat's where it's at. "It" being flavor. Moisture. And down-home juicy goodness.
Now I know better. And I hope this info betters your own brisket.
If you want to know more (a lot more) about brisket from market to main dish, check out this link:
http://www.virtualweberbullet.com/brisketselect.html
It offers a wealth of information, even a virtual brisket to help you out. A virtual brisket. Lord, take me now, I'm in heaven.
I hope you'll feel the same way after making your own brisket.
Saturday, March 29, 2008
For Smokers and Non-Smokers Alike
Ms. Lauerstein, this one's for you.
As a hobbiest cook, one of my aspirations is to "someday" make a brisket. You know, really make a brisket. Get up at 6 am, open the fridge to find a 7 lb. brisket imbibing in a magical marinade tenderly poured upon it the night before, then coating said brisket with a signature rub that would make "The Colonel's Secret Blend" of herbs and spices seem as ordinary as oatmeal. Triumphantly, I'd place our bountiful beef slab onto a professional outdoor smoker where this marbled maven would bask in the sensuous, smoky song of finely cured hickory, mesquite or pecan. For 12 pain-staking hours the smoky goodness would orchestrate a symphony of smell and flavor, piquing with a siren's song of barbecue bliss.
But that ain't happenin' quite yet.
'Cause I don't have a smoker, I have a small oven.
And I don't have a wood pile, I have a gas line.
Heck, I don't even have a basting pan. I have a 14" Pyrex dish.
*Crap.*
About the only thing I have is the brisket. A marinade recipe. A barbecue rub. And the want to turn "someday" into "today". Well, hold on, maybe this can work after all. So lemme walk you through how I made an oven brisket in hopes it'll inspire you to try to make your own brisket as well – smoker or not. Ok, let's assume you've got a brisket. Hopefully, it's around 5-6 pounds and has some nice marbling action going on.
Oh, wait...historical side note...back in the day when photos where black and white and people used to say everything was "just swell", brisket was dirt cheap, sometimes even thrown away because it was considered inedible. That's why only poor people used it. And these paupers, being resourceful and hungry, learned what we all know now – cook it low and slow. They soaked it and smoked it until the tough yielded tender and the fat fostered flavor (they also barbecued raccoon and possum too, so let's not hand them a Nobel prize just yet.) So, critters aside, we're going to take their lead to make our own oven brisket.
Ok...back to present day...take your packaged brisket and open the package over your sink. Over your sink. Not on the cutting board. Over the sink. There will be some liquid left over (it'll be r-e-d liquid) and it's better to have the liquid go down the sink rather than down your prep surface. Or your floor. Or your pants. And wash out the bag before putting it in the trash too. Nothing says, "Come 'n get it!" to neighborhood strays like a meat bag with leftover liquid.
Ok, brisket out of bag. Check. Baking pan big enough to fit it in. Check. Ok, here comes the fun part, the marinade. You can use a pre-prepped marinade off the shelf or you can make your own. Here's the one I used and it worked really well. Feel free to add or subtract whatever you like:
• 1 cup barbecue sauce (your own or off-the shelf)
• 1/4 cup Worcestershire sauce
• 1/4 cup liquid smoke (hickory, apple, natural...all great)
• 1 tablespoon garlic powder
• 2 teaspoons celery salt
• 2 teaspoons lemon pepper
• 1 teaspoon Southwestern salt (I use Pampered Chef)
• 1 cup rough chopped onion
• 1/2 cup cheap whiskey (cheap stuff goes on meat, good stuff goes in your glass)
Another side note – when you chop up an onion and don't want that onion smell to linger on your hands, try rubbing your hands on a chrome surface like your sink faucet. Not sure how or why, but it works.
Now, pour enough of the marinade to coat the bottom of the pan into, well, the pan. Then, with the fat side of the brisket up...fat side up...place the brisket gently into the pan. Jostle it in the pan a little to help it settle in. Then pour the rest of the marinade onto the brisket. Now, set the marinaded brisket inside your fridge for as few as two hours or as long as overnight. You may want to cover it to make sure it doesn't pick up any "fridge funk".
Tick. Tock. Tick. Tock. *Ding*. We're done marinading.
Ok, now for the rub. Again, off-the-shelf is fine. From-the-heart is better, but whatever rub you use pour it very liberally and coat the top of the brisket until you spy no signs of meat underneath. Just a dry, crusty shell...kind of like Larry King (sorry). Since every oven is different, plus with different climates and elevations, this is only a suggestion and not a hard and fast rule – per 1 pound of meat, it's 1 hour and 15 minutes at 250°. BE CAREFUL to make sure the finished internal temperature of the brisket is around 170°. A little more internal heat is extra insurance again food nasties, but it can also lead to more dry meat as well. We're after safe and succulent.
And now...sit and wait.
And wait. And wait. And, hey, isn't the kitchen starting to smell good? And wait. And wait. And *bing* it's 6 and a half hours (or so) later and you've got something that resembles a giant lump of coal bathing in an au jous sauce that's nothing short of divine. And after your long wait, you can't wait to get out your best Ginsu knife and cut off a slice.
But you can't.
No, not yet. 'Cause the brisket needs to rest. For half an hour. Besides, at an internal heat of 180° or so, you'll burn your mouth.
So settle down, play a speed round of Yatzee with your kids and let the brisket settle. Then, after a half hour or so, get all Norman Rockwell Thanksgiving feast with it and carve your culinary accomplishment to the gasp and awe of all who are near. And sure, feel free to take some over to your neighbor and show them how great it is living next to you. You may never have to shovel your driveway again.
Put along some sides of baked beans, cole slaw or sweet potato fries with the whole deal, sip some fresh iced tea and, well, that's some sweet, sweet lovin' right there, kids. Plus, we're one step closer to "someday".
Enjoy!
Wednesday, March 5, 2008
Beer (Bread) Me.
It's cold. It's rainy. It's time to make some beer bread, kids.
There are several recipes for beer bread, but here's one I really like. It's pretty simple, just remember, it's always easier to mix the dry ingredients to the wet mix. This avoids lumps and general doughy mayhem. Remember, "dry to wet". Print it up on a t-shirt, 'cause it's a useful little prep tidbit.
Beer Bread
• 3 cups self-rising flour
• 1/2 cup sugar
• 1 bottle room-temperature beer (Room temperature, very important)
• 1 egg
• 2 tablespoons melted butter
Preheat oven to 350°. Mix all ingredients (go ahead, get your hands dirty...it can be therapeutic). Now, here's where you have a choice. You can put it all into a 9x3 loaf pan, glaze it with the melted butter, bake it and you're good to go. Or..
"Or"?
Or...you can have some fun and make bread bowls out of it. M-m-m-m, a beer bread bowl. Maybe mix in a little pepper jack cheese into the dough. Or cheddar. Or what about some Southwestern seasoning? Cracked pepper? Make it yours, have some fun with it. Then when you have your bread bowl, carve out the middle and fill it with dip, salsa or, go ahead and put some chili in that bad boy and violá, "Dinner is served".
Lots of fun to snack on during a game, great when friends are hanging out or, as the case tonight, it's cold, dreary and I wanted to make an entrée that went well with a cold, delicious Shiner Bock beer. Know what? It worked.
Try it, lemme know what you think.
Sunday, March 2, 2008
"Hey There, Puddin'!"
So I was invited to friends house for "Game Night" to get through the Cincinnati dead-of-winter doldrums and I decided to make a cake, which in itself is an oddity. I'm usually the "I'll bring the chili", "I'll bring the beer" or "I know a place with great chili and beer" guy. Not usually the "dessert" guy (although I've got a killer pecan bourbon pie recipe I'll share with you sometime soon).
But it was snowing and my grandma always made a Red Velvet cake for my sister and me on Christmas so, well I felt a little nostalgic. But instead of using the Bundt cake format my grandma used to use, I broke out the cake pans and made a double-layered number.
Now, the real key to this deal was the white chocolate pudding between the two layers of red velvet cake. What? Pudding? Not icing between the layers of cake? Why?
Couple of reasons. One, icing is so, so sweet that more icing takes away from the cake flavor and pudding, whether it be chocolate, vanilla or when you can find it chocolate peanut butter work to throw the taster a "curve ball" while also providing added moisture into the cake. The key is to let the whole thing set overnight before you serve it so the pudding has time to permeate its flavor and moisture into both layers of cake.
So with two red velvet base cakes melded together with a white chocolate pudding middle and surrounded my cream cheese icing and coconut flakes you have more than a couple different textures and flavors interacting with each other to give your taster some unexpected, but welcome, experiences.
And, for a minute or two, it makes you remember very cleary a dear, dear lady who meant so much to both you and your sister. Around Christmas time as well as the rest of the year. Miss you, Grandma!
What's "The Rub"?
So I've been reading a lot over the past week about "rubs", you know the delicious coating that goes on a piece of meat before it sets sail on that beautiful open sea known as "the grill". The thing that turns a $6.99 steak into a $12.99 entree? Now, rubs are a little new to me, I've never made one, so I wanted to do a lot of research before posting another blog.
What a bad idea that was.
Because, like all good things in life, when you let it come to you, it's always better. Here's what I mean: I was in a used bookstore and came across a copy of Paul Kirk's Championship Barbecue Sauces book. Now, for those of you who aren't familiar with Mr. Kirk's expertise in the land of all things meaty and delicious, he's won over 400 barbecue awards, including world championships and is nicknamed "The Baron of Barbecue" by those who hold barbecue most dear. You sir, Mr. Kirk, have my attention.
So I took a Sunday afternoon and read what he had to say. Then I put his words into action.
Mr. Kirk does an extraordinary job letting everyone know that 1) He knows all the rules to making great rubs, and 2) Rules were made to be broken. He lists 30+ some odd ingredients that go into making a great rub (by the way, you should never really "rub" the rub onto the meat...it blocks up the pores and makes pockets of spice instead of creating a nice outer "skin" to both flavor the meat and seal in the juices. So just sprinkle it on and everyone will be the better for it, ok?). Kind of a misnomer in the old name department, huh? Oh well.
One thing that a good rub and, of course, time can do is to relax the meat a bit and enhance the natural flavors and attributes. And that's what we're after. Never want to mask or cover up the taste, but enhance it and help the good qualities take the stage.
Here's the rub recipe I used from Mr. Kirk's book. It's not too complicated but oh my, the taste, it was a symphony of complex flavors, textures and smells that took a simple flank steak to culinary territory it never dreamed possible.
Here's the mix I used:
1 cup sugar
1 cup garlic salt
1/2 cup paprika
3 tablespoons black pepper
2 tablespoons chipotle chili powder
1 tablespoon cumin (the greatest spice in all the world)
1 teaspoon ginger (not a ginger fan myself, but this worked out really well)
1 teaspoon onion powder
1 teaspoon ground coriander
Ok, so why not just use one of the pre-made meat rubs? You can...sure. But you spend twice as much than if you'd made it yourself and you don't have any idea what's in it. Because those packets only list a "blend of spices" and never give you a clue of how much specifically. And, c'mon, if the in-laws are coming over, it's always better to say something quippy like, "Well of course, the sugar/garlic mixture work together to both carmelize the meat while enhancing it's natural flavor."
And that....that's...when you wow them by talking about the au jous that's left behind.
Au jous? There's au jous left behind? Really?
Ah yes friends. Because I grilled mine in the oven ("The Baron" said it was ok to do that, so I'm in the clear) in a cast iron ribbed skillet and the natural juices left an extraordinary au jous that you can leave for dipping, or...OR...as an excellent base for a gravy. Your choice. And either way, trust me, you are a winner.
So next time you want to add something special to any beef, pork or chicken entree, try using a rub. Just remember to coat it thoroughly, coat it completely and use low heat to not "flash" cook it. Use the base rub listed above to start but feel free to deviate, add to and subtract from it as you like.
And lemme know how it works out for you. I'm sure Mr. Kirk will be very pleased to know you're continuing his tradition.
Friday, February 8, 2008
My Passion for Cast Iron
I only cook with cast iron. Period. The reason is simple – it cooks better. There is nothing better that having that seasoned flavor built in that comes from cooking many dishes (if not a little bacon grease).
It all started with my great-grandmother, Emma Fisher. She had an antique set of cast iron skillets which I inherited. When I brought them home, I was originally going to keep them aside as an heirloom, but it wasn't long before they were cooking up bacon, cornbread and other classic Americana dishes. I was hooked.
But I quickly found out cooking an egg in a cast iron skillet is next to impossible. Sure you can fry it in bacon grease, but that's not my thing. So I relegated my scrambled eggs to the old "stir two eggs in a bowl and nuke it in the microwave for 2 minutes" trick. "Nuked Eggs and Pan Fried Bacon", not exactly something you'd see on The Cracker Barrel menu, is it?
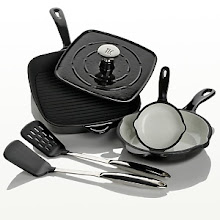
That's when I saw the new generation of cast iron cookware, with the enamel coated interior and the exterior available in another color besides black. So I ordered a set and after six months of constant use, I have not one complaint. After you season the cast iron (a 50/50 solution of EVOO and VegOil baking for an hour or so is excellent) it's ready for anything you throw at it – chilis, casseroles, bacon, even a fried egg.
I made my grandpa bacon and eggs in my cast iron skillet and his reply was, "In my 86 years, those are the best eggs I've ever had". It's easy to see why, slow heat and a seasoned surface lets the flavors seep out instead of being "flashed out" as can happen with other styles of cookware. It's your choice, but mine (and a growing number or others) prefer the new cast iron for these reasons.
Cast iron's advantage is also its downfall, it's heavy. Its dense metal construction is the very thing that can help it stay hot (or cold – freeze a cast iron pot and use it for salad or cold side dish for your next party and you'll be amazed how long it stays cool). But a filled 5 quart heavy cast iron pot can be cumbersome. So I understand why some will shy away from it.
But, if you are considering buying cast iron, I will advise you to only buy cast iron that comes with an all-metal construction. Here's why: I love to take my pots and skillets from stove top to the oven to slow roast while cooking, and you can't do that with pots that come with plastic or rubber handles (unless they're rated for 500°+). It's a great method to mix your chili recipe then put it in the oven as it gives the dish heat from all directions, not just the bottom. Doing this really releases the flavors and prevents your dish from being burnt on the bottom.
Cleanup is as simple as a paper towel to wipe out the loose stuff. And that, friends, may just be the best part.
So go ahead, break out your grandma's (or great-grandma's) cast iron, season it and make some classic Southern cornbread, fry up some bacon or fry up a pork chop or two and I think you'll start to get your own passion for cast iron cooking as well. Lemme know how it goes.
It all started with my great-grandmother, Emma Fisher. She had an antique set of cast iron skillets which I inherited. When I brought them home, I was originally going to keep them aside as an heirloom, but it wasn't long before they were cooking up bacon, cornbread and other classic Americana dishes. I was hooked.
But I quickly found out cooking an egg in a cast iron skillet is next to impossible. Sure you can fry it in bacon grease, but that's not my thing. So I relegated my scrambled eggs to the old "stir two eggs in a bowl and nuke it in the microwave for 2 minutes" trick. "Nuked Eggs and Pan Fried Bacon", not exactly something you'd see on The Cracker Barrel menu, is it?
That's when I saw the new generation of cast iron cookware, with the enamel coated interior and the exterior available in another color besides black. So I ordered a set and after six months of constant use, I have not one complaint. After you season the cast iron (a 50/50 solution of EVOO and VegOil baking for an hour or so is excellent) it's ready for anything you throw at it – chilis, casseroles, bacon, even a fried egg.
I made my grandpa bacon and eggs in my cast iron skillet and his reply was, "In my 86 years, those are the best eggs I've ever had". It's easy to see why, slow heat and a seasoned surface lets the flavors seep out instead of being "flashed out" as can happen with other styles of cookware. It's your choice, but mine (and a growing number or others) prefer the new cast iron for these reasons.
Cast iron's advantage is also its downfall, it's heavy. Its dense metal construction is the very thing that can help it stay hot (or cold – freeze a cast iron pot and use it for salad or cold side dish for your next party and you'll be amazed how long it stays cool). But a filled 5 quart heavy cast iron pot can be cumbersome. So I understand why some will shy away from it.
But, if you are considering buying cast iron, I will advise you to only buy cast iron that comes with an all-metal construction. Here's why: I love to take my pots and skillets from stove top to the oven to slow roast while cooking, and you can't do that with pots that come with plastic or rubber handles (unless they're rated for 500°+). It's a great method to mix your chili recipe then put it in the oven as it gives the dish heat from all directions, not just the bottom. Doing this really releases the flavors and prevents your dish from being burnt on the bottom.
Cleanup is as simple as a paper towel to wipe out the loose stuff. And that, friends, may just be the best part.
So go ahead, break out your grandma's (or great-grandma's) cast iron, season it and make some classic Southern cornbread, fry up some bacon or fry up a pork chop or two and I think you'll start to get your own passion for cast iron cooking as well. Lemme know how it goes.
Carroll Shelby wasn't from Cincinnati
I live in Cincinnati, originally from Indiana. Now, in Indy, when people make chili, it's their own recipe, sure. But it's got the typical red tomato base, meat, beans and spices (if you're my dad you use one of those chili-flavored dry-spice packets and say that, "Boy, you just can't beat that.").
In 2000, I came to Cincinnati and was introduced to Cincinnati-style chili. If you're from Cincinnati, this is truly chili the way God intended, but for the rest of the chili-eating universe we're frankly not sure what to make of it. Chocolate? Cinnamon? Ginger? What is that taste? And better yet, why is it in the chili? And why is it poured over spaghetti noodles? I respect it, I just don't get it.
So getting to Carrol Shelby. Carroll Shelby is a legendary race car driver, and even more famous car builder as well a recognized Texas-style chili maker (apparently they ate a lot of chili at the race tracks back in the day).
And that's how it started with me. Shelby packaged his chili mix and sold it to the public. So when I was a kid, I wanted to learn how to cook and being a fan of the classic Shelby Mustangs, I picked up a packet of Mr. Shelby's chili mix bag and proudly followed the directions to a "t" on a Friday evening. It was one of those great moments in life.
I was making chili. Texas-style. On my own.
It wasn't perfect (my fault), but it opened a window to what was to come. Cumin. Paprika. Garlic. Peppers. Onion. Chilis. Pepper and salt. All mixing and melding together to not just have a taste, but to have a "roll". A roll of flavor where you have an initial taste, then a secondary flavor, a third and then finally a nice finish. When a recipe's done correctly, all four stages work in perfect harmony to create a carnival of excellent flavor, one merging effortlessly into another like easy conversation.
Yeah, I got all that from making chili from a packet at age 12. Which is the backbone behind this blog, to share with you my cooking experiences, successes and failures as well as ask some of the hard questions, stir up a little friendly controversy, seek your expertise and make it a place where you want to check out some TexMex, down-home recipes that I sincerely hope you and your friends will enjoy.
From full-blown dinner ideas, to Friday Night EZ recipes to tailgating tips, I'll work to bring you my and my family's best recipes to enhance your next occasion. (BTW–My family and tailgating? We make everything from classic Louisiana Gumbo to gourmet veal meatballs, beer and brats, brisket and beans to made from scratch cakes and pies. My family earns its "foodie" reputation at the games and make new friends at each football game. And we never, ever have any leftovers.)
Recipes. Community. And expanding the experience. That's the job of this blog. To offer a place that inspires you to try a new recipe, spice or technique. No matter what you put in your chili.
Right Mr. Shelby?
Subscribe to:
Posts (Atom)